Remote access to a Raspberry Pi behind a router using Windows 10 is a powerful capability for tech enthusiasts, hobbyists, and professionals alike. This guide dives deep into how you can achieve this without spending a dime, enabling you to control your Raspberry Pi from anywhere in the world. Whether you're a beginner or an advanced user, this comprehensive article will equip you with all the knowledge you need to set up and maintain seamless remote access.
As remote work and IoT applications become increasingly popular, the ability to remotely access devices like the Raspberry Pi is essential. This setup opens doors to countless possibilities, from automating your home to managing servers remotely. By following this guide, you'll learn step-by-step how to configure your Raspberry Pi for remote access through your router, ensuring security and reliability.
In today's fast-paced world, having remote access to your Raspberry Pi can significantly enhance productivity and convenience. Whether you're troubleshooting a project or managing files from afar, this guide will walk you through the necessary configurations, tools, and best practices. Let's get started!
Read also:Aditya Roy Kapur The Rising Star Of Bollywood Ndash A Closer Look At His Journey
Table of Contents
- Introduction to Remote Access Raspberry Pi
- Understanding Raspberry Pi Basics
- Router Configuration for Remote Access
- Setting Up Windows 10 for Remote Access
- Establishing SSH Connection
- Configuring VNC for Remote Desktop Access
- Implementing Port Forwarding
- Enhancing Security for Remote Access
- Common Issues and Troubleshooting
- Conclusion and Next Steps
Introduction to Remote Access Raspberry Pi
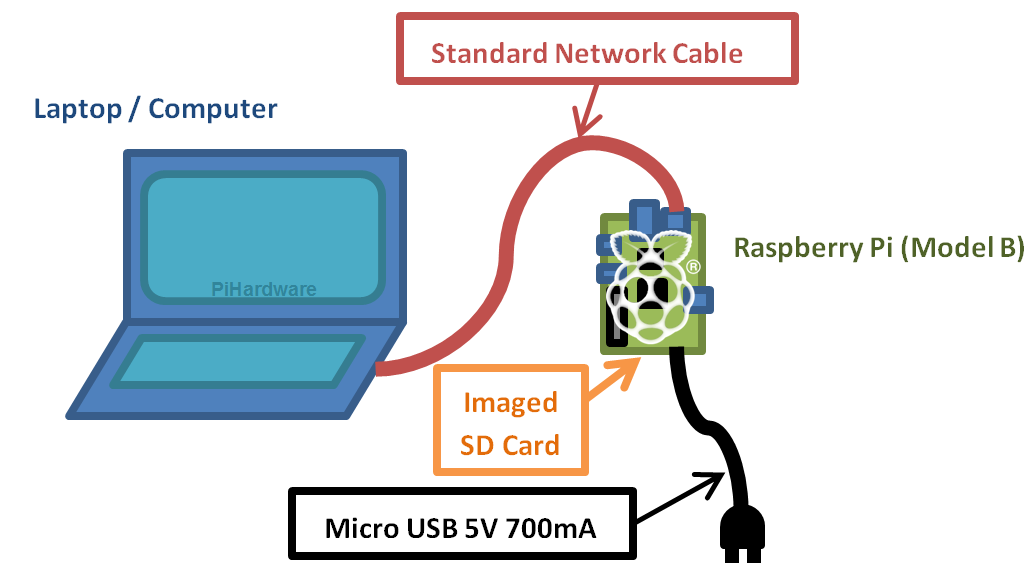
Remote access to a Raspberry Pi is a critical skill for anyone working with IoT devices or managing servers. By setting up your Raspberry Pi behind a router for remote access, you can control it from any location using Windows 10 without incurring additional costs. This setup involves configuring your router, enabling SSH or VNC on the Raspberry Pi, and ensuring proper security measures are in place.
Why Choose Raspberry Pi for Remote Access?
Raspberry Pi offers flexibility and affordability, making it an ideal choice for remote access applications. Its compatibility with various operating systems and software tools ensures seamless integration into your workflow. Additionally, its low power consumption and compact size make it perfect for remote setups.
Key Benefits of Free Remote Access
- Cost-effective solution for remote device management
- Enhanced productivity with real-time access to your projects
- Improved security through encrypted connections
- Flexibility to work from any location
Understanding Raspberry Pi Basics
Before diving into the remote access setup, it's essential to understand the basics of Raspberry Pi. This small yet powerful device runs on Linux-based operating systems and can be configured for various applications, including remote access.
Components of Raspberry Pi
- Processor: ARM-based CPU
- Memory: Typically ranges from 1GB to 8GB
- Storage: Uses microSD cards for storage
- Connectivity: Supports Wi-Fi, Ethernet, and Bluetooth
Operating Systems for Raspberry Pi
Raspberry Pi supports multiple operating systems, with Raspberry Pi OS being the most popular choice. This OS is lightweight, stable, and offers built-in support for SSH and VNC, making it ideal for remote access configurations.
Router Configuration for Remote Access
Your router plays a crucial role in enabling remote access to your Raspberry Pi. Proper configuration ensures that external devices can connect to your Raspberry Pi securely.
Accessing Router Settings
To configure your router, follow these steps:
Read also:Harry Hamlin The Iconic Journey Of A Legendary Actor
- Open a web browser and enter your router's IP address (commonly 192.168.0.1 or 192.168.1.1).
- Log in using your router's admin credentials.
- Navigate to the port forwarding or firewall settings section.
Port Forwarding Explained
Port forwarding allows external devices to connect to specific ports on your local network. For SSH access, forward port 22, and for VNC, forward port 5900. Ensure that the forwarded ports are directed to your Raspberry Pi's local IP address.
Setting Up Windows 10 for Remote Access
Windows 10 provides several tools and applications that facilitate remote access to your Raspberry Pi. By installing and configuring these tools, you can establish a secure and reliable connection.
Installing PuTTY for SSH
PuTTY is a popular SSH client for Windows. Download and install PuTTY from the official website, then configure it to connect to your Raspberry Pi's public IP address on port 22.
Setting Up VNC Viewer
VNC Viewer allows you to access the graphical desktop of your Raspberry Pi remotely. Install VNC Viewer on your Windows 10 machine and configure it to connect to your Raspberry Pi's public IP address on port 5900.
Establishing SSH Connection
SSH (Secure Shell) is a secure protocol for accessing and managing remote devices. By enabling SSH on your Raspberry Pi and configuring your router, you can establish a secure connection from your Windows 10 machine.
Enabling SSH on Raspberry Pi
To enable SSH on your Raspberry Pi, follow these steps:
- Open the Raspberry Pi Configuration tool.
- Navigate to the Interfaces tab.
- Select "Enabled" for SSH.
Connecting via PuTTY
Once SSH is enabled, use PuTTY to connect to your Raspberry Pi by entering its public IP address and selecting port 22. Enter your Raspberry Pi's login credentials when prompted.
Configuring VNC for Remote Desktop Access
VNC (Virtual Network Computing) allows you to access the graphical desktop of your Raspberry Pi remotely. By installing and configuring VNC Server on your Raspberry Pi, you can control it as if you were sitting in front of it.
Installing VNC Server
To install VNC Server on your Raspberry Pi, run the following commands in the terminal:
sudo apt update
sudo apt install realvnc-vnc-server realvnc-vnc-viewer
Connecting via VNC Viewer
After installing VNC Server, use VNC Viewer on your Windows 10 machine to connect to your Raspberry Pi by entering its public IP address and selecting port 5900. Log in using your Raspberry Pi's credentials.
Implementing Port Forwarding
Port forwarding is a critical step in enabling remote access to your Raspberry Pi. By configuring your router to forward specific ports to your Raspberry Pi's local IP address, you allow external devices to connect securely.
Steps for Port Forwarding
- Log in to your router's admin interface.
- Navigate to the port forwarding or firewall settings section.
- Add a new rule for SSH (port 22) and VNC (port 5900).
- Set the internal IP address to your Raspberry Pi's local IP address.
Enhancing Security for Remote Access
Security is paramount when setting up remote access to your Raspberry Pi. By implementing best practices, you can protect your device from unauthorized access and potential threats.
Using Strong Passwords
Ensure that your Raspberry Pi's login credentials are strong and unique. Avoid using default passwords and enable two-factor authentication if possible.
Enabling Firewall Rules
Configure your router's firewall to allow only necessary ports and IP addresses. This minimizes the risk of unauthorized access and ensures a secure connection.
Common Issues and Troubleshooting
While setting up remote access to your Raspberry Pi, you may encounter some common issues. Here are a few troubleshooting tips to help you resolve them:
Unable to Connect via SSH
- Ensure that SSH is enabled on your Raspberry Pi.
- Verify that port 22 is forwarded correctly in your router settings.
- Check your Raspberry Pi's public IP address and ensure it's reachable from outside your network.
VNC Connection Issues
- Confirm that VNC Server is installed and running on your Raspberry Pi.
- Ensure that port 5900 is forwarded correctly in your router settings.
- Verify that your VNC Viewer is configured with the correct IP address and port.
Conclusion and Next Steps
Remote access to your Raspberry Pi behind a router using Windows 10 is a powerful capability that enhances productivity and convenience. By following this guide, you've learned how to configure your Raspberry Pi, router, and Windows 10 machine for seamless remote access. Remember to prioritize security and implement best practices to protect your device.
We encourage you to share this article with others who might find it useful and leave a comment below if you have any questions or feedback. For more in-depth guides and tutorials, explore our other articles on Raspberry Pi and remote access technologies.